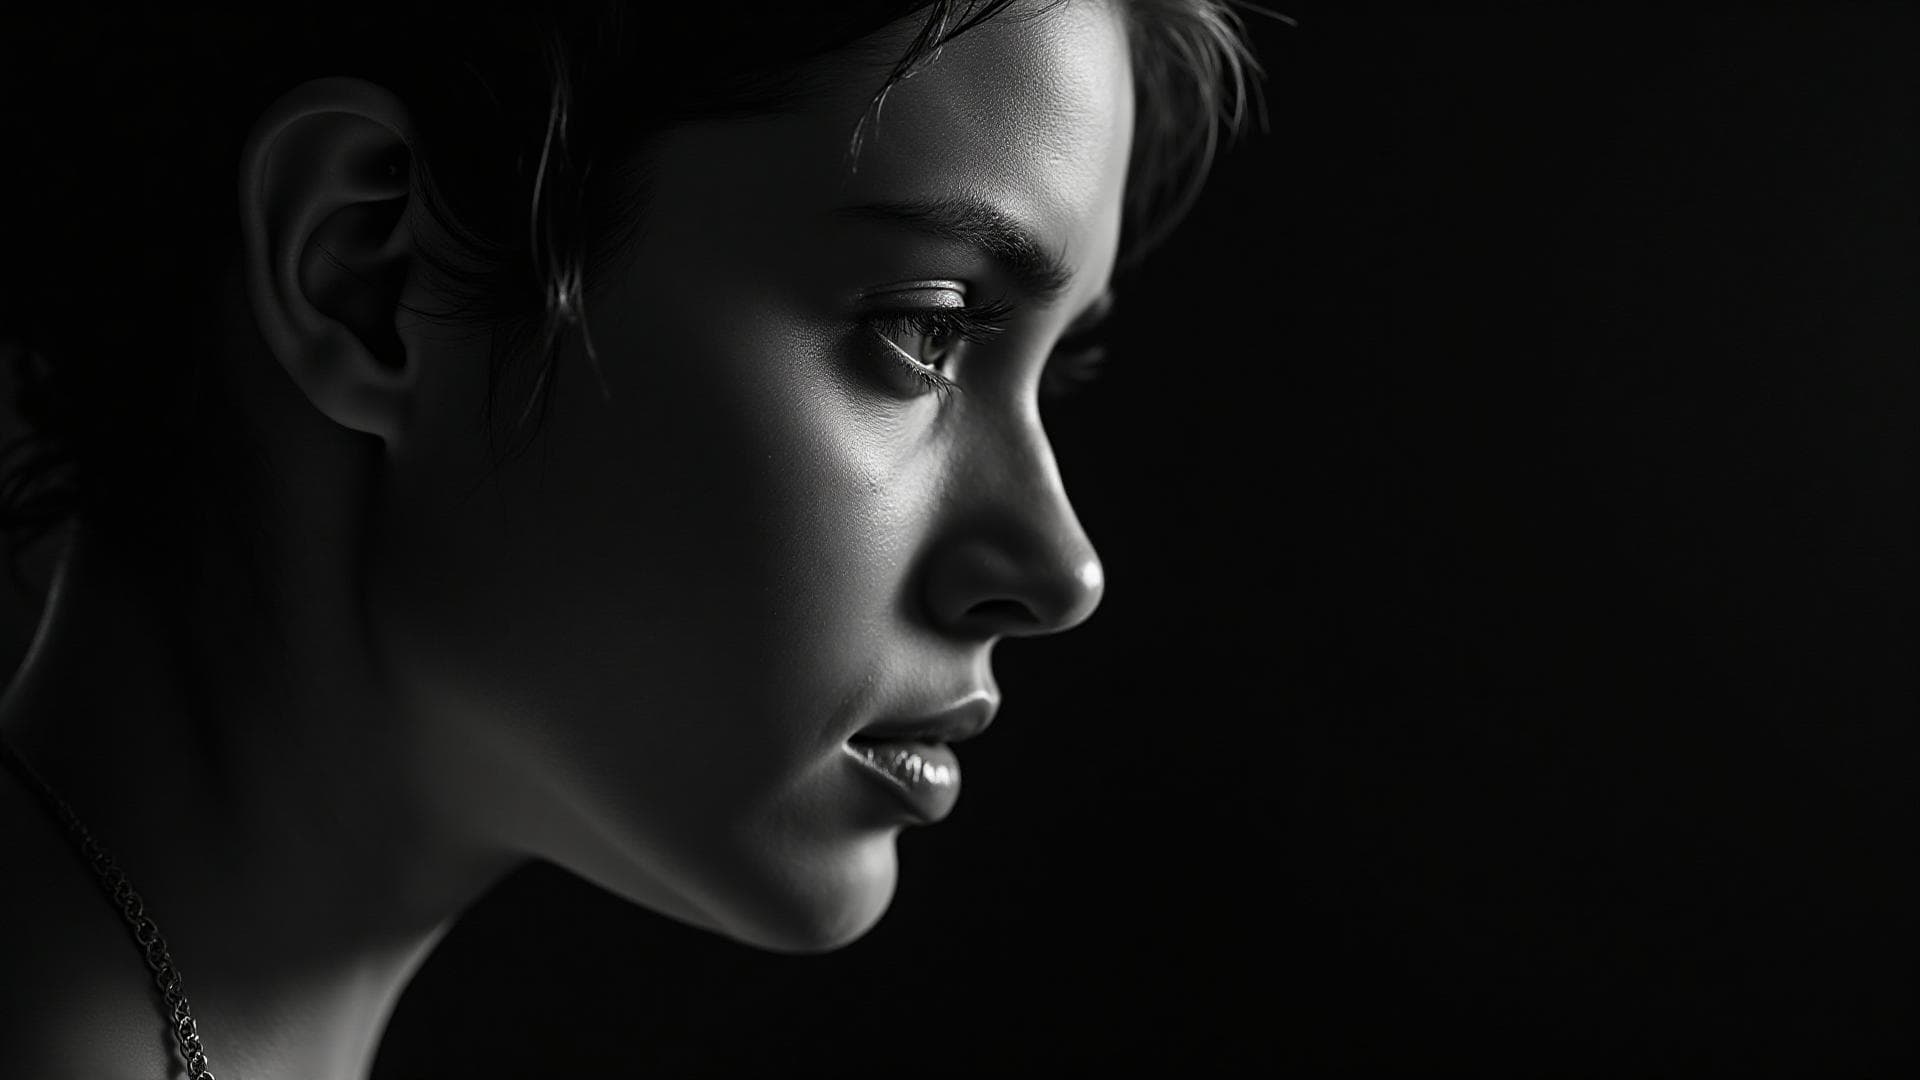
Black and white portrait photography is the art of revealing truth. By stripping away color, we expose the raw essence of our subjects - their emotion, character, and soul.
Why Black and White Still Matters in 2024
Despite living in a color-saturated digital world, monochrome portraits continue to captivate:
The Timeless Appeal - Emotion Over Distraction: Color can distract; black and white focuses on what matters - Classic Aesthetic: Images that feel both contemporary and timeless - Dramatic Impact: Higher contrast creates powerful visual statements - Texture and Form: Every wrinkle, shadow, and highlight tells a story
Understanding Light and Shadow: The Foundation
In black and white photography, light isn't just illumination - it's your paintbrush.
The Science of Tonal Contrast
Unlike color photography where hues guide the viewer's eye, monochrome relies entirely on: - Highlights: The brightest areas that catch attention first - Midtones: Where most detail and information lives - Shadows: Create depth, mystery, and dimension - Pure Blacks: Anchor the image with visual weight
5 Essential Lighting Setups
#### 1. Rembrandt Lighting Best for: Classic portraits with depth and dimension - Creates a distinctive triangle of light on the shadowed cheek - 45-degree angle from subject - Adds drama without being too moody - Pro Tip: Watch for the triangle - if it's too large, move your light closer to the camera
#### 2. Split Lighting Best for: Bold, artistic portraits with strong character - Divides the face exactly in half: light and shadow - 90-degree angle from subject - Creates striking, dramatic effect - Pro Tip: Perfect for showcasing strong facial features
#### 3. Broad Lighting Best for: Flattering wider faces, feminine portraits - Illuminates the side of face turned toward camera - Makes faces appear wider - Softer, more flattering approach - Pro Tip: Combine with a reflector to fill shadows gently
#### 4. Short Lighting Best for: Slimming effect, masculine portraits - Lights the side of face turned away from camera - Creates dimension and depth - More dramatic than broad lighting - Pro Tip: Emphasizes facial contours and bone structure
#### 5. Butterfly Lighting Best for: Beauty and glamour portraits - Light directly in front and above subject - Creates butterfly-shaped shadow under nose - Classic Hollywood glamour look - Pro Tip: Add a reflector below face to soften under-eye shadows
The Technical Blueprint: Camera Settings
Shooting Strategy: RAW in Color, Convert Later
Why shoot in color for B&W? - Maximum post-processing flexibility - Control individual color channel conversions - Preserve all tonal information - Future-proof your images
The Perfect Settings Formula
#### ISO Settings - Studio/Controlled: 100-200 (maximum quality) - Indoor Natural Light: 400-800 (balance quality and speed) - Low Light Situations: 1600-3200 (modern sensors handle it well) - Pro Tip: Slight grain can add character in B&W - don't fear higher ISOs
#### Aperture Selection - f/1.4-f/2: Ultra-shallow DOF, dreamy aesthetic, single eye in focus - f/2.8-f/4: Standard portrait range, both eyes sharp - f/5.6-f/8: Group portraits, more context in focus - Pro Tip: Wider apertures create more tonal separation from background
#### Shutter Speed Guide - Minimum: 1/125s for handheld portraits - Safe Zone: 1/160s-1/250s for sharp results - Action/Children: 1/320s or faster - Pro Tip: Use 1/(focal length × 2) rule for handheld sharpness
Focus Techniques for Maximum Impact - Eye Focus Priority: Always focus on the nearest eye - Single Point AF: Most control for precise focus placement - Face/Eye Detection: Modern cameras excel at this - Manual Focus: For ultimate precision in critical work
Post-Processing: Where Magic Happens
The Conversion Process
#### Method 1: Channel Mixer Approach 1. Open image in editing software 2. Use Channel Mixer adjustment 3. Red channel: +40-60% (skin tones) 4. Green channel: +20-40% (balanced midtones) 5. Blue channel: +0-20% (sky, eyes)
#### Method 2: Color Filter Simulation Replicate classic film filters: - Red Filter: Dramatic skies, lighter skin - Orange Filter: Balanced, natural look - Yellow Filter: Subtle enhancement - Green Filter: Lighter foliage, natural skin - Blue Filter: Enhanced texture, darker skin
The Power of Dodging and Burning
Dodging (Lightening): - Highlight eyes to draw attention - Lift shadows for detail - Create dimension in highlights
Burning (Darkening): - Deepen shadows for drama - Darken background for separation - Add weight to shadows
Pro Workflow: 1. Create separate dodge/burn layers 2. Use 5-10% opacity brush 3. Build effect gradually 4. Work non-destructively
Advanced Techniques
#### Contrast Mastery - Global Contrast: Overall punch and impact - Local Contrast: Micro-contrast for texture - Curves Adjustment: S-curve for classic look - Pro Tip: Use multiple subtle adjustments vs. one extreme change
#### Skin Retouching in B&W 1. Frequency Separation: Separate texture from tone 2. Subtle Smoothing: Preserve skin texture (over-smoothing looks fake) 3. Blemish Removal: Clean but natural 4. Texture Enhancement: Bring out character in mature subjects
#### The Vignette Effect - Subtle Darkening: 10-20% edge darkening - Feather Heavily: Smooth, unnoticeable transition - Purpose: Draw eye to subject - Pro Tip: Apply before final sharpening
Composition for Monochrome Portraits
The Psychology of Framing
#### Headshot - When: Professional, intimate emotion - Crop: Bottom of shoulders to top of head - Focus: Eyes, expression, skin texture
#### Head and Shoulders - When: Classic portrait style - Crop: Mid-chest to above head - Focus: Expression with some context
#### Environmental Portrait - When: Telling a broader story - Crop: Full or 3/4 body with surroundings - Focus: Subject in their element
The Rule of Negative Space - More Space = More Impact: Don't fill every pixel - Breathing Room: Let images breathe - Direction: Leave space where subject is looking - Simplicity: Less is almost always more
Inspiration: Study the Masters
Historic Legends - Ansel Adams: Tonal mastery, zone system - Richard Avedon: Stark, powerful portraits - Irving Penn: Minimal, elegant compositions - Yousuf Karsh: Dramatic lighting, character revelation
Modern Innovators - Platon: Political portraits, intense connection - Mary Ellen Mark: Documentary emotion - Sebastião Salgado: Epic human condition - Joey Lawrence: Contemporary studio mastery
Common Mistakes to Avoid
❌ Converting Without Thinking The Problem: Simply desaturating or using auto B&W The Solution: Intentional color channel mixing
❌ Muddy Midtones The Problem: Flat, gray images with no punch The Solution: Strong contrast, true blacks, bright highlights
❌ Over-Processing The Problem: Unnatural skin, extreme contrast, visible halos The Solution: Subtle adjustments, build gradually
❌ Losing Detail The Problem: Blown highlights or blocked shadows The Solution: Expose properly, preserve information
❌ Forgetting the Background The Problem: Distracting elements in monochrome The Solution: Simple, clean backgrounds or strong separation
Your Action Plan: From Beginner to Master
Week 1-2: Light Study - Practice all 5 lighting setups - Photograph same subject with each - Study how light shapes form
Week 3-4: Technical Mastery - Experiment with different ISOs - Test aperture range - Perfect your camera settings workflow
Week 5-6: Conversion Skills - Try different conversion methods - Build your color channel presets - Develop your signature look
Week 7-8: Post-Processing Deep Dive - Master dodging and burning - Practice frequency separation - Develop efficient workflow
Month 3+: Artistic Development - Study master photographers daily - Shoot regularly with intention - Develop your unique voice
The Philosophy: Beyond Technique
Great black and white portraits aren't about perfect technique - they're about connection, emotion, and truth.
Remember: - Technique serves vision, not the other way around - Imperfection adds character - embrace grain, grain, and real skin - Emotion trumps perfection - a genuine moment beats technical perfection - Less is more - simplicity creates impact
Final Thoughts
Black and white portrait photography is a journey, not a destination. Every portrait is an opportunity to see deeper, connect stronger, and create something timeless.
The goal isn't just to remove color - it's to reveal truth, capture soul, and create art that transcends time.
Now pick up your camera and start creating images that will look just as powerful in 50 years as they do today.