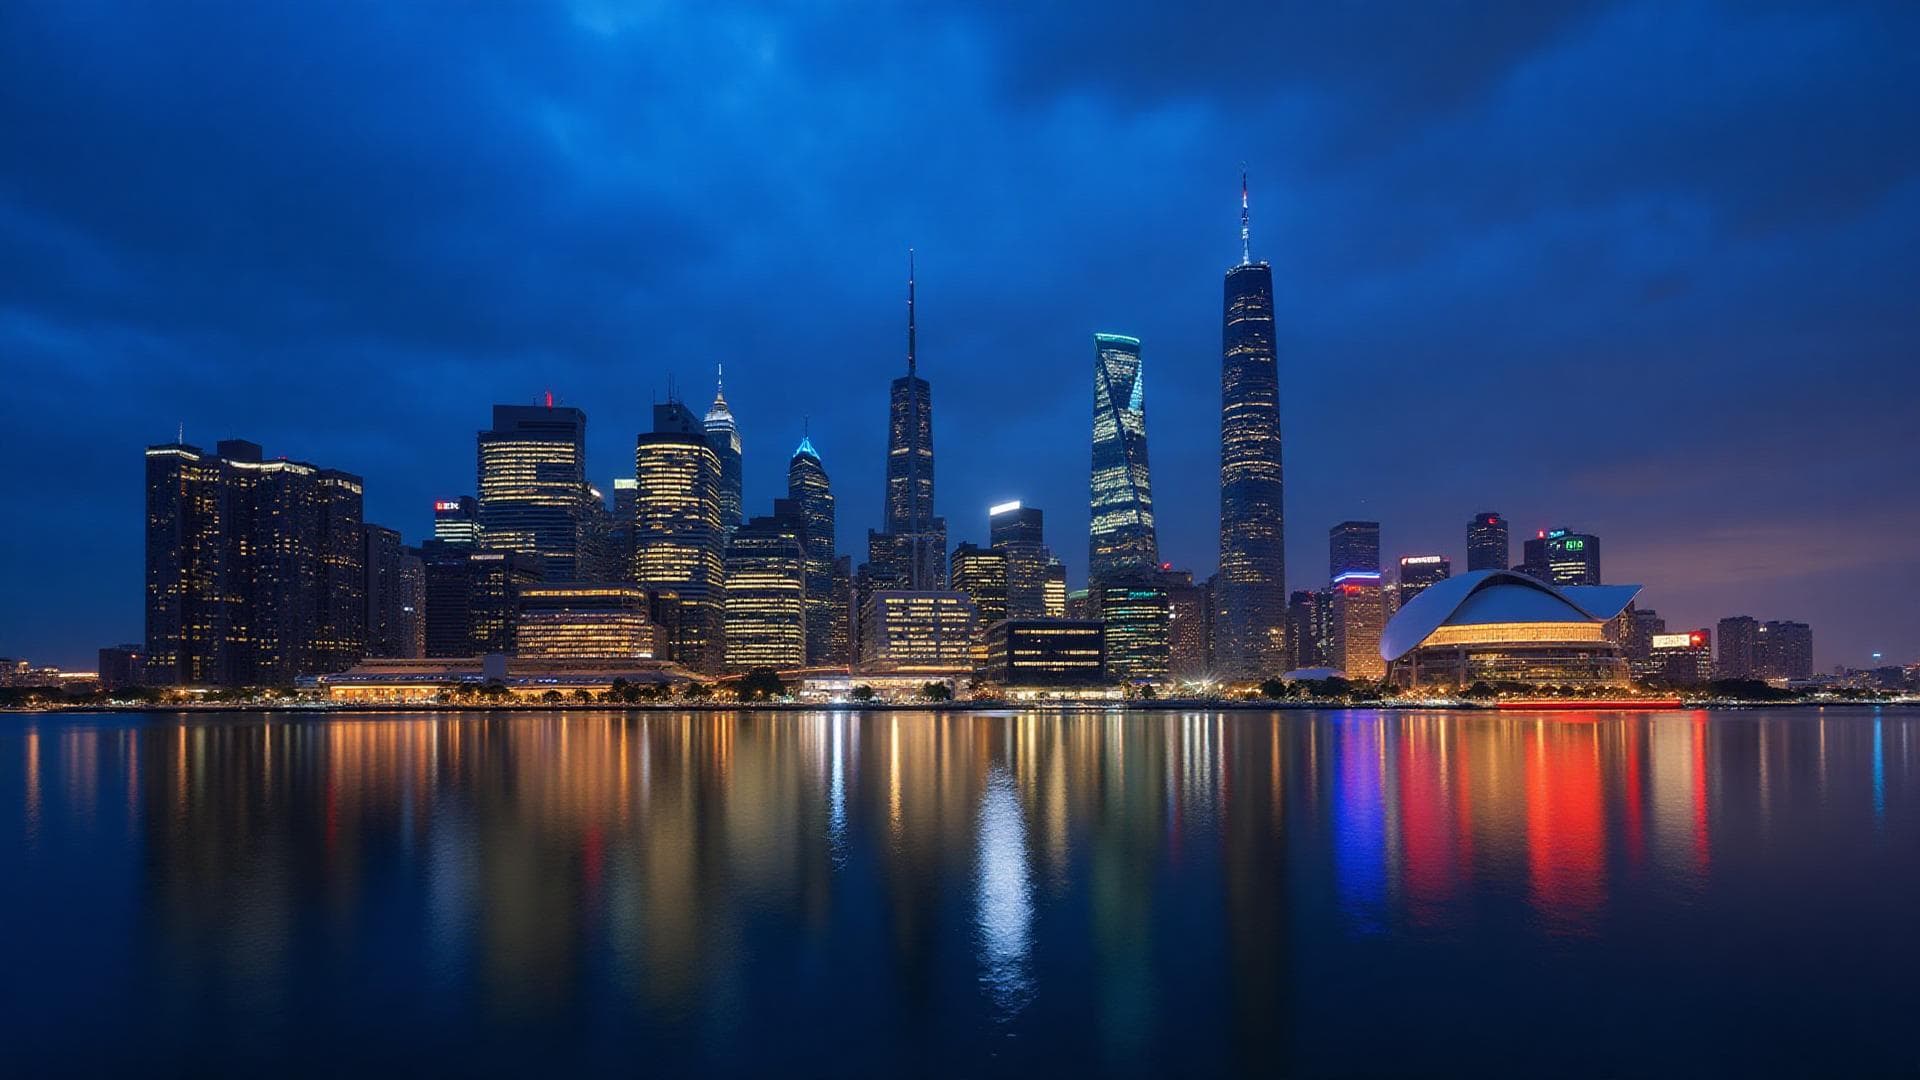
The blue hour - that magical time just before sunrise or after sunset when the sky turns a deep, saturated blue - offers some of the most beautiful lighting conditions for photography.
What is Blue Hour?
Blue hour occurs twice daily: - Morning: 20-40 minutes before sunrise - Evening: 20-40 minutes after sunset
The exact duration varies by latitude and season. Closer to the equator, the transition is faster.
Essential Equipment
To make the most of blue hour photography:
Tripod
Absolutely essential for long exposures
Remote shutter release
Prevents camera shake
Wide-angle lens
Captures expansive cityscapes or landscapes
ND filters
For even longer exposures during brighter moments
Camera Settings
Blue hour requires balancing ambient light with artificial lights:
Aperture
f/8 to f/16 for sharp cityscape details
ISO
Start at 400-800, adjust as light fades
Shutter Speed
1-30 seconds, depending on the light level
White Balance
5000-6000K to preserve the blue tones
Composition Tips
The best blue hour shots combine natural and artificial light:
- Cityscapes: Capture the contrast between blue sky and warm city lights
- Reflections: Use water to double the impact
- Silhouettes: Create dramatic shapes against the colorful sky
- Long exposures: Smooth water and create light trails from traffic
Timing is Everything
Use apps like PhotoPills or The Photographer's Ephemeris to plan your shoot. Arrive early to compose your shot, then capture multiple exposures as the light changes rapidly.
The blue hour doesn't last long, but the images you create during this time will last forever.